Quantcast
Channel: Evothings | RSS Feed
Viewing all 97 articles
Browse latest View live

Evothings secured, now serving over HTTPS!

$
0
0

Screen Shot 2016-01-28 at 14.51.12

There is a major security trend on the Internet today, including search engines floating secure websites over insecure ones, websites turning from regular HTTP to HTTPS in every market segment imaginable. It involves acquiring a certificate to put on each domain or site, ensuring visitors that the organizations behind the site is legitimate, or at least matches with the one advertised. And now services are popping up which issue HTTPS certificates without cost, like Let’s Encrypt which is another driver.

For us as an industrial tools provider, it’s imperative to abide to the leading standards in accessibility and security, in order to maintain an unbroken chain of secure data. Many applications are mission critical for our customers and their end-users. Many service contracts and legal agreements disallow regular, less secure transports like HTTP, RTSP or FTP access, regardless of the nature of the payload. So we are happy to announce that Evothings uses HTTPS for all communication between your development environment, servers and connected mobile end-points.

In practice, it means that any web page served from a secure server can only acquire resources from other sites if they in turn also are served over HTTPS with their respective certificates in place. Resources served from sites which have HTTPS enabled, while using so-called “self signed” certificates won’t be served either. Anyone can generate a self-signed certificate without contacting anyone, and they simply won’t do since the certificates are not issued by a certificate authority.

Screen Shot 2016-01-28 at 14.50.42

From Evothings’ point-of-view as an industrial mobile tools provider, this means an improved working environment for all involved and a less complex task for the developer to ensure end-to-end security from sensor devices to server, and for each mobile device serving in one of several roles in the system; as gateway for local sensor data, as dashboard for viewing data in a comprehensive manner, as remote control, data visualizations device for analytics, and in many contexts also as off-line storage and usage, to name some of the most common uses of mobile IoT apps today.

It also means that special care has to be taken when mixing secure and unsecure resources, as it wrongly used can circumvent the sandbox security set up for preventing attempted man-in-the-middle attacks, port sniffing et cetera. See it as the Web’s best effort to control every API and access point in the systems involved. Here’s a classic JSON call using jQuery and HTTPS:

var flickerAPI = "https://api.flickr.com/services/feeds/photos_public.gne?jsoncallback=?";    
$.getJSON(flickerAPI, {
    tags: "mount rainier",
    tagmode: "any",
    format: "json"
  })
  .done(function(data) {
    $.each(data.items, function(i, item) {
      $("").attr("src", item.media.m).appendTo("#images");
      if (i === 3) {return false;} //only the first three items
    });
  });

Given that you know what you’re doing as a developer, there are alternative paths to take: An obvious one, which always has been open to native developers, is to acquire the external resource from outside of the web container and then – after finding it well-formed and free of potentially malicious contents – serving it up as local contents into the web container over the Cordova bridge. There are also specific services who offer a controlled gateway, to pull unsecure resources in from specific domains, check them and release like Amazon’s AWS API Gateway. Setting up your own way of collecting plaintext resources requires you as a developer to programmatically cleanse any potential occurrences of malicious code yourself, identical to the case where a native developer fetches resources natively when working out of xCode or the Android SDK.

1328101868_Folder-Secure

Here’s the Cordova way of picking up a JSON resource outside of the web container. Note that these calls are made differently than the regular calls made normally from inside. Note further that the more extravagant features, such as uploading from a mobile device using HTTP PUT, are not enabled in this restricted version of the HTTP plugin. See our page on Github for more information on our willful disabling of less desired features.

In the code below (which requires the cordovaHTTP plugin in order to work, and will fail in your desktop browser), the function hyper.log is a global function which writes back to the Workbench “Tools” section, very useful for many things. Try the “eval selection” button for instance.

Ok, back to the code. Find below a typical HTTP GET which is called from either a HTTP or HTTPS page:

cordovaHTTP.get(
	'http://evothings.com/demo',  
    function(response) // on success
    {
        hyper.log('HTTP success: ' + response.status);
        hyper.log(response.data);
    }, 
    function(error) // on error
    {
        hyper.log('error: ' + JSON.stringify(error));
    });

There are two things you need have in place in your code, to make this run properly. (1) One is a link to the cordova javascript library in the index.html file:

<script src="cordova.js"></script>

.
Evothings apps in general already have this in place. Note; you don’t need to add the library as such as it’s already on-board in the Viewer app.
(2) You need to allow the scripts to load before running the app’s main function. There are several ways to do this naturally, while I like adding an event listener on deviceready:

document.addEventListener(
    'deviceready',
    function() { main() },
    false);

As always it’s a good idea to have an extra look at what came in the door in terms of data, and that it is well formed. Depending on the nature of the resource, additional sanity checks could be necessary, while outside of the scope of this article. When JSON was first introduced, it was common to use eval() to evaluate the json-string, while modern day javascripters per default shun such practice as it potentially opens up a security exception big enough for Ben Hur’s chariot race to ride right through.

road-sign-579551_960_720

A basic approach to check up on the contents of an incoming text stream, would be to use try/catch as a preamble to any mission critical operation, in our case of the fetched JSON. And no, this won’t save the world from malicious code, yet it’s good to start thinking about end-to-end security and how to get there.

var json; 
try 
	{  // is the resource well-formed?
	json = JSON.parse(client.responseText); 
	}
catch (ex) 
	{   
	// Invalid JSON, notify of the failure...
	alert(‘Could not parse json, aborting..’);
	} 
if (json) 
	{ 
	// Ok, it seems to be valid JSON, proceed here with the code
	}

p.s Only version 1.2 and onwards of Evothings Viewer can carry out outside-the-web-sandbox CordovaHTTP() requests. if you really need to pick up external resources over HTTP you’ll need to upgrade your mobile clients at the public app stores or roll your own from our Github account.

Download Evothings Studio now to secure your app development, also when involving testers over public networks!


Explore the new Evothings IoT documentation site

$
0
0

We have just launched a new documentation site. Welcome to explore starter guides, tutorials, example programs and API-references. All to help you make the mobile app you want for your IoT project.

Are you curious about Eddystone beacons? Head for the Eddstone Starter Guide.

What about iBeacon apps? Go to the iBeacon Starter Guide.

Are you into Arduino and are new to mobile app development? The Arduino LED On/Off TCP and the Arduino LED On/Off BLE example apps are for you!

Want to make an app for the mega-popular ESP8266? Read the ESP8266 tutorial and run the ESP8266 example app.


Fun holiday project
[Image credits]

Do you have techie children? Jump to the tutorial How to make a sensor enabled mobile app and make an app together with your kids.

Do you hate reading? Download Evothings Studio and run the BLE Scan example app. You may find some Bluetooth Low Energy devices out there you did not know about.

Want to learn about the details regarding HTTP and HTTPS and how to download content to your app without having to deal with “cross-domain” (CORS) issues? The IoT Cloud Guide may have some answers for you.

Do you want to ask questions, hang out, discuss IoT? Join in on the Evothings Gitter channel at gitter.im/evothings/evothings

What about impressing your colleagues? Get Evothings Studio and show them how to run mobile apps on their phones.

Get started with mobile apps for IoT in 60 seconds

$
0
0

It is easier than ever to get started with mobile app development for the Internet of Things. If you can make a web page, you can also make a mobile app!

Watch this video to see how to get up and running with Evothings Studio in just 60 seconds!

To learn more, read the getting started tutorial which contains additional details to help you get going with mobile apps for IoT.

Or, if you are the brave kind of developer who does not fear new territories, head directly for the download page and be up and running within minutes. Evothings Studio is fun and easy!

Evothings Studio 2.1 alpha with support for Web Bluetooth and ECMAScript 6

$
0
0

Writing mobile apps that communicate with IoT devices using Bluetooth Low Energy (BLE) can be quite an undertaking. Web Bluetooth is a new API that makes it easier to develop BLE enabled applications in JavaScript. In this post we present an overview of Web Bluetooth and invite you to download a brand new release of Evothings Studio for early testers.

Web Bluetooth

Web Bluetooth is a standards initiative by the W3C Web Bluetooth Community Group.
Originally designed to enable apps running in web browsers to communicate with BLE devices, the Web Bluetooth API is now also available for mobile apps built with Apache Cordova.

The Web Bluetooth API specification makes use of ECMAScript 6, a new version of JavaScript that features a new function closure syntax and a bunch of other improvements. You can write Web Bluetooth applications using ECMAScript 5, but the code becomes more readable with ECMAScript 6.

During the last few weeks, we have been busy implementing support for Web Bluetooth and ECMAScript 6 in Evothings Studio 2.1.0, now available in a release for early testers.

Bleat – Bluetooth Low Energy Abstraction Tool

To bring Web Bluetooth to mobile apps, we have used Bleat, which offers libraries and a pluggable architecture for BLE APIs in JavaScript. Bleat was created by Rob Moran (@thegecko), who works in the mbed team at ARM and is part of the W3C Web Bluetooth Community Group. Thanks to Bleat, we have been able to include early support for Web Bluetooth in Evothings Studio.

Bleat is included with the new example apps for ARM mbed (classic) and TI SensorTag that ships with Evothings Studio 2.1.0-alpha.

ECMAScript 6

ECMAScript 6 or ECMAScript 2015, or simply ES6, is a new version of the JavaScript language. ES6 has several new features (such as arrow functions) that fit nicely with the Web Bluetooth API.

ES6 is not yet widely supported on mobile devices. We have included the Babel compiler in Evothings Studio 2.1.0-alpha, which enables writing mobile apps in ES6. When you click the Run button in Evothings Workbench, ES6 source files are transparently translated to ES5, and your app launches as usual on connected mobile phones.

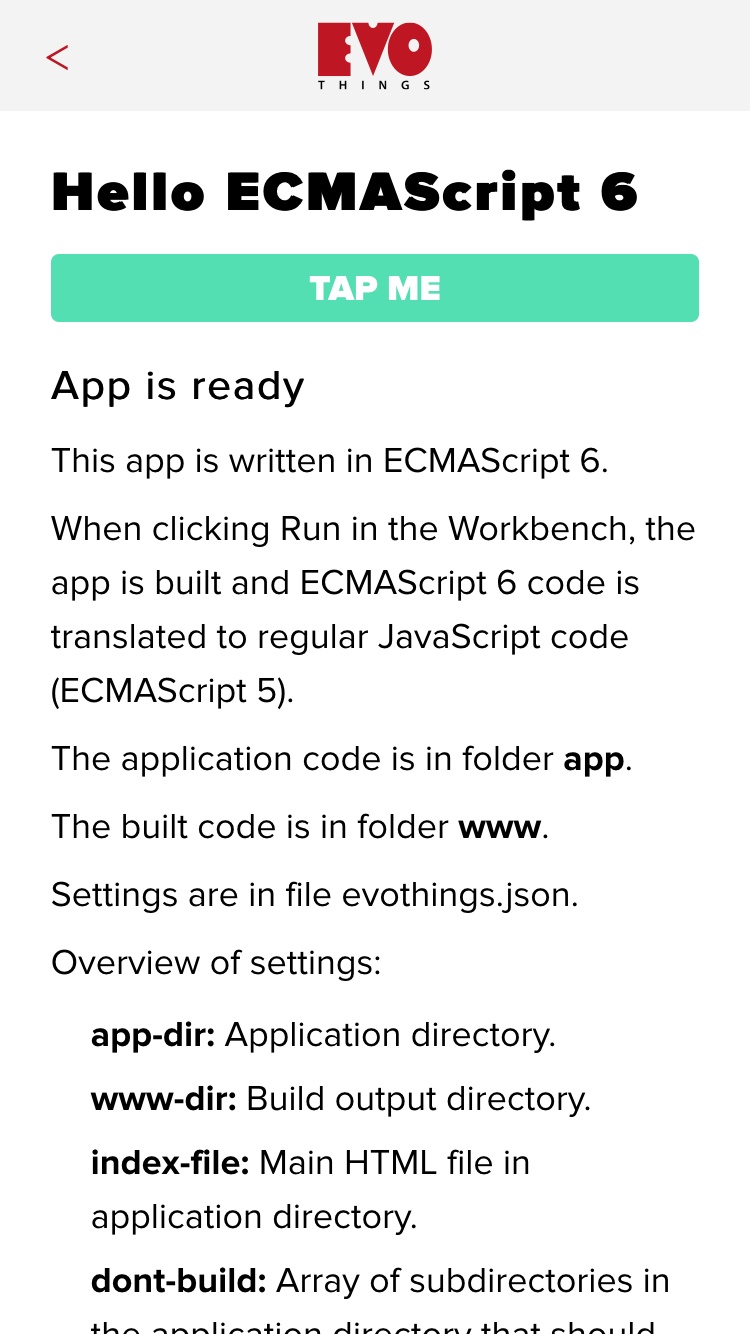
Run the Hello ECMAScript 6 that comes with the Evothings Studio 2.1.0-alpha download to see ES6 in action.

Visit the Evothings ECMAScript 6 documentation page to learn more.

A taste of the Web Bluetooth API

Let’s illustrate the Web Bluetooth API with a classic example, blinking a LED. Here we connect to a named device and start blinking a LED on the device:

// Find device named 'MyDevice' (you can also find
// device by service UUIDs).
bleat.requestDevice({
    filters:[{ name: 'MyDevice' }]
})
.then(device => {
    // Connect to device.
    return device.gatt.connect();
})
.then(server => {
    // Get service.
    return server.getPrimaryService(LED_SERVICE_UUID);
})
.then(service => {
    // Get LED write characteristic.
    return service.getCharacteristic(LED_WRITE_UUID);
})
.then(characteristic => {
    // Start blinking the LED each second.
    var ledState = 0;
    setInterval(() => {
        ledState = 0 === ledState ? 1 : 0;
        characteristic.writeValue(new Uint8Array([ledState]));
    }, 1000);
})
.catch(error => {
    console.log('Error: ' + error);
});

Function requestDevice is the entry point in the Web Bluetooth API. It scans for devices that matches the filters you provide, and returns a matching device. It is possible to filter devices by name and by service UUID.

Each function in the Web Bluetooth API returns a Promise, an object that will invoke a callback function when the promise is fulfilled (for example when a matching device is found, or a BLE service or characteristic is available). The function .then is used to specify the callback for a promise. Together with arrow functions in ES6, this makes for a clean syntax for code that is based on async functions and callbacks.

New extensions to the Web Bluetooth API

In the original Web Bluetooth specification, requestDevice brings up a UI controlled by the browser, which displays a list of matching devices the user can select from. When selecting a device, the promise returned by requestDevice is resolved.

With mobile apps developed using Apache Cordova, and in applications developed using node.js, the requirements are a bit different. It can be desirable to have control of the device selection UI, and to be able to scan for devices (such as Eddystone devices) and connect to them programmatically.

Rob Moran has presented extensions to Web Bluetooth, to allow more flexibility for apps that are not running in a web browser context. These extensions are implemented in Bleat, included in Evothings Studio, and allows mobile apps to use requestDevice for tasks such as scanning for beacons and connect devices in a flexible way.

Web Bluetooth example apps

Evothings Studio 2.1.0-alpha comes with two new example apps that uses Web Bluetooth and the Bleat library.

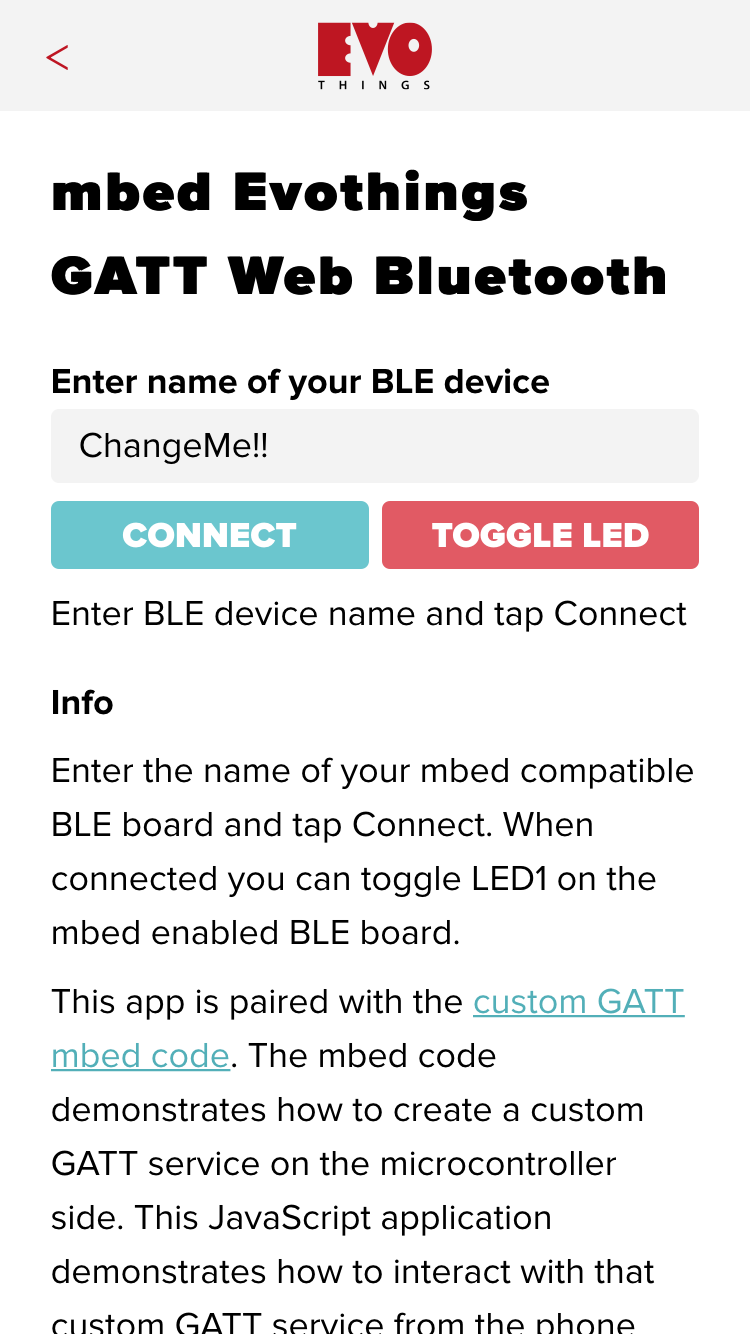
mbed GATT Web Bluetooth

This is an app for ARM mbed devices, that turns on and off a LED on the device.

The application code shows how to connect to a device and read and write characteristics using Web Bluetooth API.

mbed-nordic-nrf51-dk

We have been using the Nordic Semiconductor nRF51 DK when developing and testing this app.

TI SensorTag CC2541 Accelerometer Web Bluetooth

This app listens for the TI SensorTag CC2541 accelerometer sensor, and displays sensor data continuously.

The application code shows how to enable notifications using Web Bluetooth API.

mbed-nordic-nrf51-dk

Get started with Web Bluetooth and ES6

Download Evothings Studio 2.1.0-alpha and get started with mobile app development using Web Bluetooth.

You will find the download under the alpha section on the Evothings download page.

Web Bluetooth meets ARM mbed OS

$
0
0

At Evothings we are following the new mbed OS (not to be confused with the old mbed “classic”) closely as we think it is perhaps the most promising professional eco system for making embedded IoT software that works across many different devices. We are also looking at making integrations with the mbed OS toolset in the Evothings Workbench!

In this tutorial we are going through the “moves” in building a mobile hybrid app in JavaScript that runs on both iOS and Android and talks BLE using the new Web Bluetooth API to communicate with an nRF51-DK running a simple mbed OS application.

I am using Ubuntu 14.04 (64 bit Linux) in this tutorial, but I have also added notes for doing it all from OSX.

Diving into mbed OS

Let’s start on the embedded side. In order to build mbed OS applications we need to install the tools for it. The people at ARM mbed have been very nice to produce clear and precise installation instructions for Linux, no sweat, I just followed it.

NOTE OSX: I also ran this on my OSX machine (10.9.5) and there I followed the manual homebrew installation. I did stumble on a b0rken pip, but a quick brew --link overwrite python got me through that one, your mileage may vary!

This means we now have a proper GCC for ARM and we have the yotta (or yt for less typing) build tool. We can even enable command completion for it. Let’s do the good ol Blinky to get started, we are basically following the official documentation:

$ mkdir blinky
$ cd blinky
$ yt init 
Enter the module name:  
Enter the initial version: <0.0.0> 
Is this an executable (instead of a re-usable library module)?  yes
Short description: Blinky, blinky little star
Author: Göran Krampe
What is the license for this project (Apache-2.0, ISC, MIT etc.)?  

$ tree
.
├── module.json
├── source
└── test

2 directories, 1 file

When running yt init just make sure to answer “yes” about this being an executable.
As can be seen the above questions produces a module.json file containing the collected metadata:

{
  "name": "blinky",
  "version": "0.0.0",
  "bin": "./source",
  "private": true,
  "description": "Blinky, blinky little star",
  "author": "G\u00f6ran Krampe",
  "license": "Apache-2.0",
  "dependencies": {}
}

Of course, we could have created this file manually too, it’s just a JSON file.

Next up we need to select a supported target for this project. I tried using the recently created nrf52dk-gcc target together with the newer nRF52-DK but… it’s not yet an operational target for mbed, but I did chat a bit with a friendly developer at Nordic who is working on the mbed OS support for it and I suspect it will soon arrive since the 52 seems to be better in all respects.

mbed-nordic-nrf51-dk

Thus we fall back on the venerable Nordic Semiconductor nRF51-DK. We can look for valid targets using yotta:

$ yotta search target nrf51dk
nrf51dk-gcc 1.0.0:
    Official mbed build target for the nRF51-DK 32KB platform.
    mbed-official, mbed-target:nrf51_dk, gcc
nrf51dk-armcc 1.0.0:
    Official mbed build target for the nRF51-DK 32KB platform.
    mbed-official, mbed-target:nrf51_dk, armcc
$ 

We select the first one and enable it like below. At this point you will probably be asked to register/login to mbed etc, and … yes, you will need to get that done :)

Then it should eventually spit out something like this:

$ yotta target nrf51dk-gcc
info: get versions for nrf51dk-gcc
info: download nrf51dk-gcc@1.0.0 from the public module registry
info: get versions for nordic-nrf51822-gcc
info: download nordic-nrf51822-gcc@1.0.0 from the public module registry
info: get versions for mbed-gcc
info: download mbed-gcc@1.1.0 from the public module registry
$

Let’s also just verify the target is now set:

$ yotta target
nrf51dk-gcc 1.0.0
nordic-nrf51822-gcc 1.0.0
mbed-gcc 1.1.0
$

Here we see that there is a yotta_targets sub directory with three different targets in it, inheriting each other. The mbed-gcc target is an abstract target for all GCC based targets and is inherited by nordic-nrf51822-gcc which is also abstract and covers building for devices using this chip. The nrf51dk-gcc inherits from nordic-nrf51822-gcc and is the concrete target we are using for our nRF51-DK device.

Evidently any mbed app needs the mbed-drivers as a dependency and we can add that using… you guessed it, yotta:

$ yotta install mbed-drivers
info: get versions for mbed-drivers
info: download mbed-drivers@0.12.1 from the public module registry
info: dependency mbed-drivers: ~0.12.1 written to module.json
info: get versions for mbed-hal
info: download mbed-hal@1.2.2 from the public module registry
info: get versions for cmsis-core
info: download cmsis-core@1.1.2 from the public module registry
info: get versions for ualloc
info: download ualloc@1.0.3 from the public module registry
info: get versions for minar
info: download minar@1.0.4 from the public module registry
info: get versions for core-util
info: download core-util@1.3.0 from the public module registry
info: get versions for compiler-polyfill
info: download compiler-polyfill@1.2.1 from the public module registry
info: get versions for mbed-hal-nordic
info: download mbed-hal-nordic@2.0.0 from the public module registry
info: get versions for mbed-hal-nrf51822-mcu
info: download mbed-hal-nrf51822-mcu@2.1.5 from the public module registry
info: get versions for nrf51-sdk
info: download nrf51-sdk@2.2.1 from the public module registry
info: get versions for mbed-hal-nrf51dk
info: download mbed-hal-nrf51dk@2.0.0 from the public module registry
info: get versions for cmsis-core-nordic
info: download cmsis-core-nordic@1.0.1 from the public module registry
info: get versions for cmsis-core-nrf51822
info: download cmsis-core-nrf51822@1.3.2 from the public module registry
info: get versions for dlmalloc
info: download dlmalloc@1.0.0 from the public module registry
info: get versions for minar-platform
info: download minar-platform@1.0.0 from the public module registry
info: get versions for minar-platform-mbed
info: download minar-platform-mbed@1.1.2 from the public module registry
$

Now we can verify that yotta indeed installed a whole bunch of modules and also added this dependency to our modules.json file:

$ ls yotta_modules/
cmsis-core           core-util     mbed-hal-nordic        minar-platform
cmsis-core-nordic    dlmalloc      mbed-hal-nrf51822-mcu  minar-platform-mbed
cmsis-core-nrf51822  mbed-drivers  mbed-hal-nrf51dk       nrf51-sdk
compiler-polyfill    mbed-hal      minar                  ualloc
$ cat module.json 
{
  "name": "blinky",
  "version": "0.0.0",
  "bin": "./source",
  "private": true,
  "description": "Blinky, blinky little star",
  "author": "G\u00f6ran Krampe",
  "license": "Apache-2.0",
  "dependencies": {
    "mbed-drivers": "~0.12.1"
  }
}
$

Of course, we also need some code for blinky, shamefully ripped from mbed’s documentation we add a file source/app.cpp with this content:

#include "mbed-drivers/mbed.h"

static void blinky(void) {
    static DigitalOut led(LED1);
    led = !led;
    printf("LED = %d \r\n",led.read());
}

void app_start(int, char**) {
    minar::Scheduler::postCallback(blinky).period(minar::milliseconds(500));
}

Comparing the above code with Arduino style sketches we can conclude some obvious details:

  • ARM and mbed buys into C++ more clearly and is a bit less worried about verbosity :)
  • We have a more regular startup where we ourselves can set up periodic callbacks instead of doing all in a single loop() function.
  • The stronger C++ focus is clearly also seen with the DigitalOut class that implements the = operator

C++

Build it!

Finally, time to build. As you might have realized by now, yotta is our swiss army chain saw – it not only performs duties to install and maintain dependencies, it also handles the build for us. Underneath the hood it generates CMake files which in turn generates Ninja “make files” to drive the actual compilation and linking process. When we run yt build it should hopefully end with something like this at the end:

[118/118] Linking CXX executable source/blinky
Memory usage for 'blinky'
section             size
.data                128
.bss                 760
.heap              19592
.stack              2048

And we can verify that we got some binaries out of this:

$ ls -lart build/nrf51dk-gcc/source/
total 1072
-rw-rw-r-- 1 gokr gokr    707 Feb 22 13:27 CMakeLists.txt
-rw-rw-r-- 1 gokr gokr    319 Feb 22 13:27 CTestTestfile.cmake
-rw-rw-r-- 1 gokr gokr   1017 Feb 22 13:27 cmake_install.cmake
drwxrwxr-x 3 gokr gokr   4096 Feb 22 13:27 CMakeFiles
drwxrwxr-x 6 gokr gokr   4096 Feb 22 13:27 ..
-rw-rw-r-- 1 gokr gokr 245931 Feb 22 13:27 blinky.map
-rwxrwxr-x 1 gokr gokr 391064 Feb 22 13:27 blinky
-rw-rw-r-- 1 gokr gokr  72388 Feb 22 13:27 blinky.hex
-rw-rw-r-- 1 gokr gokr 372516 Feb 22 13:27 blinky-combined.hex
-rwxrwxr-x 1 gokr gokr  25708 Feb 22 13:27 blinky.bin

…which one to use? Seems to be four reasonable candidates, and I am not sure how you are meant to know which one… aaaah, the suspense! Read on to find out!

Prepping the board

Before we can flash the binary by simply copying over the correct file to the board mounted as a USB drive, we first need to perform a firmware update of the board to “mbed enable” it. This particular step was not obvious to me when reading the mbed OS documentation! To seasoned mbed classic developers it’s probably obvious.

This firmware is referred to as an “mbed interface upgrade file”. Hook up your nRF51DK with a USB cable and follow the steps under the heading “Firmware Update” and you should end up with the board mounted as “MBED”, it worked fine for me at least, on Ubuntu Linux that is, I haven’t tried the procedure on OSX.

Now we can simply copy a file (which one? which one?) over to this device in order to flash it, and press the reset button to get blinking glory!

Flashing blinky

So… in the build/nrf51dk-gcc/source/ directory we have the following to choose from:

-rwxrwxr-x 1 gokr gokr 391064 Feb 17 08:38 blinky
-rw-rw-r-- 1 gokr gokr  72388 Feb 17 08:38 blinky.hex
-rw-rw-r-- 1 gokr gokr 372516 Feb 17 08:38 blinky-combined.hex
-rwxrwxr-x 1 gokr gokr  25708 Feb 17 08:38 blinky.bin

I tried blinky.bin and blinky.hex before caving in and asking someone, but of course, the correct choice was blinky-combined.hex! Oh well, you learn as long as you live :)

cp build/nrf51dk-gcc/source/blinky-combined.hex /media/gokr/MBED/

…and then pressing the reset button on the nRF51DK, and we have blinking!

muahaha

Ok, yeah, not that impressive, but still :)

NOTE OSX: Flashing works fine, just replace /media/gokr/MBED with /Volumes/MBED/.

Stepping up the game

Now we are in the zone and know how to hack code. Let’s combine some sample code so that we can control the board over BLE instead!

I cheated of course and went hunting for sample code. Obviously the BLE examples sounded promising. Then I took the code from BLE LED and BLE Button and combined them.

At first when I tried yt build I got an error:

$ yt build
...blabla...
/home/gokr/blinky/source/main.cpp:18:21: fatal error: ble/BLE.h: No such file or directory
compilation terminated.
ninja: build stopped: subcommand failed.
error: command ['ninja'] failed
$

Aha… dependencies! Yotta to the rescue:

$ yt install ble
info: get versions for ble
info: download ble@2.5.0 from the public module registry
info: dependency ble: ^2.5.0 written to module.json
info: get versions for ble-nrf51822
info: download ble-nrf51822@2.5.0 from the public module registry
$ 

A bunch of warnings later – success!

Ok, so… at this point I am not going to force you to copy/paste anymore, let’s just back up a level out of the blinky directory and clone my demos repo fork, go into mbedos-nrf51dk-webbluetooth and build it:

$ git clone https://github.com/gokr/evothings-demos.git
$ cd evothings-demos/mbedos-nrf51dk-webbluetooth
$ yt build

You can take a look at the code of course, it’s just an adapted/combined variant of the example code from ARM which both has a blink-a-LED service and a read-a-button service. And smack it onto the nRF51DK:

cp build/nrf51dk-gcc/source/viber-combined.hex /media/gokr/MBED/

To get it running you should also press the reset button on the nRF51DK, it should start blinking to show its alive.

Going Mobile

Now we want to talk to this puppy using a mobile Evothings application. The new Evothings 2.1 has support for ES6 (ECMAScript 2015) and Web Bluetooth! It’s available as a first working alpha release and you can install (unzip somewhere) it alongside the regular 2.0 version without problems.

In the git clone we have a directory called evothings, in there is the Evothings hybrid mobile application. So first you need to download and install the 2.1 version of the Workbench. Just unzip it in your home directory and start it up by running ./EvothingsWorkbench in tere. Proceed by following the instructions in the Connect tab to get a phone/tablet connected.

Next you can open up the Ubuntu file browser tool, find the evothings-deoms/mbedos-nrf51dk-webbluetooth/evothings/evothings.json file and drag it onto the Workbench. This should get the application listed under the MyApps tab.

Now you can press RUN on it, and it should fire up on your phone. When playing with the application it is useful to also have the Javascript Workbench open, so press the “Tools” button in the upper right corner to open it. In the bottom pane you will see any logging that is done in the mobile app.

Ok, so where is the code then? It’s the evothings/app/app.js file which you can also view on github. This sourcecode is written in ES6 (ECMAScript 2015) and when you edit and save it using your favorite editor the Evothings Workbench will notice and rebuild it using Babel and place the resulting file in evothings/www/app.js and also trigger a reload of it on the phone!

If you have your nRF51DK running as described above, it should appear as “VIBER” in any BLE scanner, and have two primary services – one for manipulating the LED and one for reading the state of the button (the one closest to the center of the board).

The mobile application, when you press start, does the following:

  1. Scan and find “VIBER” device
  2. Connect to “VIBER” device
  3. Find the service for the button
  4. Read the characteristic for the button
  5. Read the value for the button
  6. Decide if we should vibrate
  7. Disconnect and wait for 1000 ms before starting over

Viber

Crazy app! But… a bit interesting to see how it behaves with say 5-10 phones running it. In theory they should all (eventually) start to vibrate if the button is held down on the nRF51DK, and stop vibrating when its released. So we get a sense of how a crowd of BLE central devices can “poll” a BLE device for some state. We could also do something with the LED of course, but that’s left as an exercise.

BEWARE: This application sometimes behaves fine and sometimes very much less so getting stuck etc. I have not yet managed to figure out exactly why!

Conclusion

Building and coding for mbed OS was not hard to get starteed with. I like the command line focus and the yotta tool is quite neat. It should only get better with more targets and the libraries seem to be growing quite strong.

The new Web Bluetooth API is interesting and will most surely be established as a standard way of using BLE from JavaScript, in a hybrid mobile app, or in a browser. It’s very Early In The Game but we are working closely with its development.

And Evothings Workbench? It rocks of course, but I am partial since I work at Evothings :)

Hope you found this article interesting, download Evothings Studio 2.1 alpha today and start hacking Web Bluetooth!

download

Evothings Studio 2.0 final release!

$
0
0

The entire team at Evothings are happy to announce that Evothings Studio 2.0 is released and stable, and we’re no longer in beta! Yay!!

Available at evothings.com/download

We’d like to take this opportunity to thank you all using our Beta versions, it has tremendous value to us and we’ve gained so much knowledge on how apps connecting phones to other things, systems and clouds should work. You guys rock, and we hope you’ll like the end result as well!

As always, we’re looking forward to hear what you think, and would you have any questions, comments or suggstions on how to make Evothings Studio even better – feel free to use our channel on Gitter; gitter.im/evothings/evothings.

Penn State University taking attendance using beacons

$
0
0

Blog article by David Fusco, professor at Penn State University, College of IST (Information Sciences and Technology)

In order for me to be able to assign attendance grades for a course that I teach, I need my students to sign in to our LMS (Learning Management System), navigate to the course, select the ‘Resources’ tab, get the randomly generated code for today’s class that’s been written on the board up front, then enter it in the box provided. Me, as the professor, earlier in the day, had to log in to the same LMS, navigate to the course, same ‘Resources’ tab, and then copy down (or remember – not likely) the alpha generated code to be used later.

It’s either that or I get my student assistant to do it for me. Either way, taking attendance is a fairly tedious process. In other classes, where professors don’t use the university-supplied LMS, their student assistants are taking attendance via a hardcopy roster. At least the hardcopy roster version, for the most part, ensured that people where there. In my version, there’s nothing from stopping a friend from texting the code for the day to his buddy who is sleeping back in his dorm.

As a professor at Penn State University in the College of IST (Information Sciences and Technology), I’m constantly trying to keep on top of all things tech. My tech background is in networking, so gravitating towards IoT was a natural fit for me. Last fall, I created an executive-style enterprise architecture program for Cisco Systems and we talked a great deal about IoT and Fog Computing. It definitely peaked my interest and I felt I needed to learn more. I kind of knew what beacons were, at least in the RFID realm. There are plenty of other articles that explain the difference between the new beacon world. I highly suggest you become educated on the primary differences between these two topics:

  1. iBeacon vs Eddystone
  2. iOS vs Android implementations of the Physical Web

What I wanted to do

Back to my problem. Taking attendance should not be this hard. I thought – there HAS to be a way to be able to know if a student is in my room or not, identify who they are, and then record their attendance automatically. A quick bit of background on another tech solution I used – an LRS (Learning Record Store). In short, it’s a system that tracks small, micro-activities performed by a person (or M2M). It stores ‘I DID THIS’. Or, in my case, I attended IST 420 (on a given date).

A quick summary of what I wanted to do:

  • Turn my Mac into a beacon (because I was too cheap to buy a real beacon – I know, I know, they are only like $10, but even more importantly, I didn’t want to wait for it to arrive)
  • Each class, turn on the beacon (I take my Mac to every class with me)
  • Have the student have an app on their phone (I had a backup plan for those that didn’t have one, for those of you who feel this is unfair to them)
  • That app would see the beacon and then automatically register their attendance in the LRS. On first launch, it would have the student enter their email address and then remember it for subsequent uses.

What really happened

I read a LOT about beacons, the tech behind it, and drew out a picture of what this would look like. I also built a server on my home network (VM LAMP stack – I used Turnkey LAMP); I wanted to have a web server as an intermediate processor, this proved to be very useful later.

Turnkey LAMP

And I bought MacBeacon from Radius Networks.

MacBeacon

NOTE: It only emulates iBeacon; As of this writing, I still haven’t found a good Eddystone emulator. If there is one, I didn’t find it or was too lazy to write one.

User Interface

I then dug into the app side – I was convinced that making an app was the only way to go for this. I’ll circle back around later and compare to Eddystone, which opened my mind to another way.
I spent quite a bit of time with this. Went down the path of looking at Xcode and educating myself on what it takes to build an app, and I looked at the Ionic framework. Quite frankly, I didn’t want to learn another language and honestly, Xcode seemed to be a pain, at least for the simple thing I wanted to do. I already knew HTML and Javascript. I wondered if there’s a way to create a mobile app using the tools, languages, frameworks I already understood. Of course there is!

Again, there are lots of other articles explaining how to do this. Below is the ionic interface, I ended up just coding it by hand in an HTML editor. Not that this is bad, I just wanted to do too many custom JS functions and didn’t need the front-end design part.

Ionic

Evothings

Then, during my Google searches of this, I came across Evothings and the workbench solution. Wow – what an awesome product that’s going to save me TONS of time.

I copied the iBeacon Scan example provided and I was on my way.

Evothings Workbench

I added my LRS libraries and my send code, well, they aren’t mine, they are from the Tin Can API folks. I had been using them for another project and wanted to include them here. A natural fit.

Tin Can

After this, I modified app.js and my logic to basically continually scan for beacons and then take action once my iBeacon signal was detected. Did I say how much time Evothings Workbench saved me for testing?

A side note, I had one very important piece – I wanted to remember the user after the first time. window.localStorage.getItem helped in that area. I also used (cheated) the beacon.major and beacon.minor to help me fake the app into being able to see it as an individual class. Nothing fancy, but it worked.

Get current date and convert beacon.major to a course:

JavaScript code

Build specific course by date being stored – I only wanted to take attendance one per day per course per student:

JavaScript code

See if it’s the first time running the app or if the cache has been cleared:

JavaScript code

See if the record for the day has already been cut; if not, send the LRS statement:

JavaScript code

After a bit of tinkering and polishing off my JavaScript knowledge, my app was working perfectly. Now I just need to get it to the students.

Deploying the app

Needess to say, I fell into a hole. The hole that is called ‘getting your app into the iTunes store’. Man, what a long and cumbersome process. I’ll save the certificates, Phonegap, and all things iTunes for another blog post. Let’s just say, that didn’t take me where I wanted to be. Not that this process won’t work for those of you looking to publish a polished app – this just wasn’t for me. Too cumbersome. For the record, the service that Phonegap is offering is pretty awesome, so many thanks to them for that.

Phonegap

  • What if I wanted to update the app?
  • What if I wanted students to be able to write their own app and share them – QUICKLY?
  • And what about Android? I hadn’t even gotten to that point yet.

So, I asked Peter Svensson, from Evothings, who had been extremely helpful during my journey. He suggested I take to the Evothings Gitter discussions. Which I did.

Evothings Gitter

The folks there were quick and very helpful. They turned me on to the Evothings viewer app. I had been looking for a quick way to distribute my app. This wasn’t perfect, but it was very, very close. I could have students install this and then change my code on the back end all I wanted. By this time, I moved my code to my production server, on the public Internet. What I did was give them an intermediate HTML launch page that then redirected them locally to an EVO:// app, through the viewer.

Evothings Viewer
Share App
Launch
HTML source
MacBeacon
Open in App
Recorded

It worked!

Recorded

Well, mostly. For some reason, some Android phones weren’t detecting my beacon, but for everyone else, it worked perfectly and their attendance was recorded into my LRS. All students had to do was:

  1. Install the viewer app
  2. Open the URL in their browser – http://drdavefusco.com/attendance/launch.html and then click on the launch link.

That would then redirect them to the local Evothings app via the EVO: protocol. The fine folks at Evothings can tell you how that works. I just know it does.

What’s next

  • Change the intermediate launch page to autoredirect (like 3 seconds) instead of having an A HREF link; this would save the student from having to click
  • Figure out why some Android phones aren’t seeing the beacon
  • See how I can export my LRS activities into my LMS so that part isn’t manual. There’s some info about Canvas and xAPI, but I haven’t dug into it yet. And it’s not likely the university is going to allow me into the code for our LMS.
  • See how this might work with an Eddystone URL and not have an app at all. That’s for another post.

Hint: I now have it working exactly the same way, using a Radius Networks’ Eddystone beacon, Chrome, and the same backend logic. Just a different approach. If you want to read more on that, here’s a good article from Radius networks. In a nutshell, it’s the same process except I moved the logic to one HTML file hosted on my web site that is broadcast via the Eddystone beacon and its Eddystone URL. Students can get to this via the instructions included in the Radius Networks article. The Android side is a bit different, but like I said, that’s for another post.

Evothings and the BBC micro:bit

$
0
0

microbitAs this March 2016 – the World became a wee bit better place; The British Broadcasting Corporation commenced its fabled launch of the Micro:bit single chip computer, with the ultimate goal to provide each school child aged 11-12 with their own computer that they can work, play with and program themselves. There is an extensive site available with more information and links to both simple on-line services and downloads for more sophisticated tools.

At 16MHz, its dual-core ARM Cortex M0 is perhaps not the most powerful microprocessor around, but enough to carry out sensor readings, send out strings of accentuator commands and other fairly sophisticated operations e.g. when using the 5×5 LED matrix display. At Evothings, we were asked by the consortium around the micro:bit if we would like to contribute with our technology, allowing for supporting mobile apps to be developed faster and easier using web technologies which are easy to learn for both kids, teachers and other adults too. We have focused on the communication over the Bluetooth Low Energy radio, and have created a few examples appropriate for the current “vanilla build of micro:bit build with ARM mbed firmware”. All these demos are released as Open Source under the Apache 2 license, and are hence free to use, modify, enhance and even sell for a profit if you’d like, without our consent or knowledge ☺ The code is fairly well-structured, and verbosely commented to ease usage, and to better understand which part does what in each example.

In order to run these projects, you’ll need Evothings Studio, an application Workbench on your computer and an app called Evothings Viewer, for your Android and iOS devices. Download from evothings.com/download (and the apps from your appstore).

The first example is a kitchen sink demo, getting the available sensor data out. Note that turning everything on (known as xmas tree mode) makes all sensors share the data channel, and will run slower if say, only a few sensors were propagating data.

https://evothings.com/doc/examples/microbit-demo.html

The second example runs the accelerometer sensor, in three dimensions (x,y,z) and plots the data across a timeline in red, green and blue.

https://evothings.com/doc/examples/microbit-sensors.html

The third example allows users to send text over Blueooth Low Energy to from the phone to the micro:bit, to be displayed on the 5×5 LED matrix.

https://evothings.com/doc/examples/microbit-led.html

We at Evothings take this opportunity to challenge you as a developer to create your own stunning application, either based on one of these examples or by combining any of the sensors of the micro:bit for the learning and pleasure of the micro:bit community.

There are also further plans to release the entire software stack of the micro:bit, its hardware and much of the supporting application frameworks to the community. Eventually, micro:bit technology will be released to the general public, and many players will offer similar hardware, accessories and supporting software during the latter part of 2016 and onwards.

Go ahead, make some apps!


Evothings Studio 2.1 Alpha 2 at large

$
0
0

This is the Evothings Studio 2.1 Alpha 2. It’s a handful, and you’ll be one of the first to try it out! We work in shorter sprints nowadays; this means more releases, more excitement and more topical examples added every time.

https://evothings.com/download/#alpha

There are three new micro:bit examples at large, in celebration of BBC’s release of the bespoke microcontroller sent out to 1,000,000 school children in the United Kingdom this Spring. We also got a Bluefruit LE in the e-mail, which rendered two new Bluefruit LE UART examples. The same goes with the Arduino 101 for those who’ve invested in the latest addition to the Arduino family with the little Curie (Intel) onboard, we conjured a fine Bluetooth Smart (BLE) example for you there.

The biggest addition to Evothings Studio in this release is the Instrumentation window. It’s a game changer, we can sense it, while it might be hard to grasp even for us all the possibilities enabled. You have to see it for yourself, just open the experimental Instrumentation window reachable by clicking the “Viewers” status text at bottom right corner.

And for closers, we’ve also done some housekeeping; added Disconnect all viewers function in More menu, another button for apps that opens a documentation URL in the external browser and more entires in More menu to reach FAQ documentation pages and an entry to reach our gitter chat.

Download Evothings Studio now and enjoy!

Cordova BLE plugin updated – Bluetooth Low Energy apps in JavaScript

$
0
0

The Evothings Cordova BLE plugin has been updated with new features and bug fixes. Read on to learn what is new and how to use the plugin in your Cordova mobile applications.

What is new in the BLE plugin

New in the Cordova BLE plugin is:

  • Support for background scanning on iOS and Android – develop mobile apps that scan for BLE devices and Eddystone beacons when the app is in the background.
  • Scanning for an explicit Service UUID is now supported, which makes scanning more efficient and is required for background scanning on iOS.
  • The way characteristic notifications are turned on/off has been simplified on Android – behaviour is now the same on both Android and iOS.

Read the release notes for further details.

Get the BLE plugin from GitHub or npm.

What you can do with the plugin

The BLE plugin allows you to develop mobile apps in HTML/JavaScript and build native apps for publication on the iOS and Android app stores using the Apache Cordova build system.

Example of things you can do with the plugin:

  • Scan for nearby BLE devices
  • Get estimated distance to BLE devices using the RSSI and txPower values
  • Scan for Eddystone compatible beacons
  • Connect to BLE devices from your app and read and write data on the device
  • Connect to multiple devices

mbed-nordic-nrf51-dkThere are numerous applications for BLE, for instance:

  • Industrial applications, e.g. tracking, sensors, and control systems.
  • Health and fitness applications, e.g. heartbeat/pulse, exercise apps, anti-stress apps, etc.
  • DIY and Maker applications – Mobile apps written in HTML/JavaScript are perfect for developing apps for microcontrollers like ARM mbed boards and Arduino, RedBear Lab, and many others.
  • rad_beaconsBeacons – Write apps that scan for beacons and display related information. Beacons are perfect for context-aware applications, displaying information and tracking physical objects.

Support for Web Bluetooth

The BLE plugin supports the Web Bluetooth API using a library written on top of the plugin. Find out more about Evothings Studio and support forWeb Bluetooth and also for ECMAScript 6.

Develop BLE apps with a fast workflow

We are working on a new version of the Evothings Viewer app that will include the new BLE plugin. Evothings Viewer is the companion app for Evothings Studio.

Using Evothings Viewer and Evothings Workbench you can develop mobile apps for Bluetooth Low Energy with a really fast workflow. It just takes seconds to reload your app on connected mobile phones and instantly try it out – with real BLE devices.

Then build your app with Cordova and it is ready to be submitted to the app stores!

How to get started

Here are links to documentation pages and tutorials that help you to get started:

Download Evothings Studio – be up and running with mobile apps for BLE in just 5 minutes

Follow these steps to get started quickly with running a mobile BLE application:

  1. Download Evothings Studio
  2. Unpack the download package and run Evothings Workbench
  3. Install the Evothings Viewer app on your Android or iOS mobile phone or tablet (get it from the app stores)
  4. Connect to the Workbench from the Viewer (follow on-screen instructions in the Workbench)
  5. Run the example app “BLE Scan”
  6. Enjoy searching for nearby BLE devices!

Instrumentation and inspection of hybrid apps

$
0
0


What goes on on-board the mobile device during development, prototyping and testing? How can you probe what a bluetooth radio can see in terms of other devices and services? In the Evothings Workbench, there is such an option nowadays, as well as the ability to conditionally inject files into the code running on the phone or tablet for various purposes – the sky is the limit.

Read the full story here in this tutorial by Peter Svensson: https://evothings.com/doc/tutorials/instrumentation.html

How to handle cross-protocol, cross-domain issues when fetching JSON with ajax via HTTP GET

$
0
0

Screen Shot 2016-04-28 at 10.11.42There has been several questions on the forum after a preamble article on the subject, and also on our new Gitter channel on problems when fetching JSON objects from the web. Your code may either work in a browser but not in the Evothings Viewer or any other Corodova app, or the other way around when you run files in your regular browser (always look in the console for hints). By padding the JSON call to be served in a script format (jsonp), you can get across the domain barrier, but it won’t help much when you’re on a https page, attempting to call an unsecure http resource.

Therefore, we need a simple way to investigate firstly if we’re in a Cordova app, and then either use a regular ajax call using jQuery, or by calling the Cordova HTTP plug-in, with which you can fetch the resource, whatever is in myURL in this case, outside of the web container. This plug-in is installed per default in the Evothings Viewer, while there are certain limitation as compared to XMLHttpRequest; lack or support for reading return headers, error responses and cookies are not supported as they are in regular ajax calls.

So here we go, and after including the jQuery libraries….

<script src="https://code.jquery.com/jquery-2.1.1.min.js"></script>
<script src="https://code.jquery.com/mobile/1.4.5/jquery.mobile-1.4.5.js"></script>

..look if there is a Cordova object, window.cordova, in place.

function getJSON() {
   if (window.cordova) {
      // do something cordova style
   }
   else {
      // fallback to web methods
   }

So, let’s say that there was a Cordova object, then you could invoke the CordovaHTTP plug-in…

cordovaHTTP.get(
   myURL,
   function (response) {
      if (response) {
         sensor.data = JSON.parse(response.data);
         // do something useful with the data
      }
   },
   function (error) {
      console.log(JSON.stringify(error));
   }
);

…and the fall-back, which works in any browser across domains, but not across protocols. Calling an unsecure HTTP resource this way in Evothings Studio will fail, as we follow the industry’s requirement for secure end-to-end services. While if your resource is based on the HTTPS protocol, it’ll work just fine and you don’t need to use the CordovaHTTP plug-in at all.

console.log('Not using Cordova, fallback to AJAX via jquery');
 $.ajax({
    url: myURL,
    jsonp: "callback",
    cache: true,
    dataType: "jsonp",
    data: {
       page: 1
    },
    success: function(response) {
       if (response && response[0]){
         sensor.data = response;
           // do something useful with that data
       }
    }
 });

So, as a summary, here is the code for this example in one go. You can also find the code as a html file if you prefer (right-click, you know). It is a working example with live data, from one of our projects, the Dome of Visions, gathering data on activities, on location in Stockholm, Sweden.

Good luck with your mobile, hybrid development!

<!DOCTYPE html>
<html>
<head>
    <meta charset="utf-8" />
    <meta name="viewport" content="width=device-width, user-scalable=no,
        shrink-to-fit=no, initial-scale=1.0, minimum-scale=1.0, maximum-scale=1.0" />
    <title>Getting data from a json API</title>
    <link rel="stylesheet" href="https://code.jquery.com/mobile/1.4.5/jquery.mobile-1.4.5.css" />
    <script src="https://code.jquery.com/jquery-2.1.1.min.js"></script>
    <script src="https://code.jquery.com/mobile/1.4.5/jquery.mobile-1.4.5.js"></script>

    <!-- This following script, cordova.js, hooks up the web container with the installed plug-ins, 
    and is already included into Evothings Viewer (i.e. you don't need to add this script file to your 
    project folder).  -->
    <script src="cordova.js"></script>

    <script>
    // Redirect console.log to Evothings Workbench, so you can see data coming in under 'Tools'. 
    // If you're not using Evothings, you can skip this part.
    if (window.hyper && window.hyper.log) { hyper.log = console.log }
    </script>
</head>

<body>
<script>

// Create an empty object as a global, to store data
var sensor = {};

// Where the sensor data is stored. This data comes from http://domeofvisions.se
var baseURL = 'http://backup.evothings.com:8082/output/';

// A subscriber's key (Five other keys also availble at http://smartspaces.r1.kth.se:8082)
sensor.key = "BQa4EqqbgxfMgpBQ8XwNhvP82Dj";

// assembly of the URL, getting the last day's worth of data in json format
myURL = baseURL + sensor.key + '.json?gt[timestamp]=now-1day&page=1'

// A bitmap image describing in general where this specific sensor is located
sensor.image = "https://evothings.com/demos/dome_pics/IMG_1758.JPG";

// Function to retrieve data, placing it in a "response" object
function getJSON() {
    if (window.cordova){
        console.log('Using Apache Cordova HTTP GET function');
        cordovaHTTP.get(
            myURL,
            function (response) {
                if (response) {
                    sensor.data = JSON.parse(response.data)[0];
                    sensor.fullData = JSON.parse(response.data);
                    printData();
                }
            },
            function (error){
                console.log(JSON.stringify(error));
            });
    }    
    else {
        console.log('Not using Cordova, fallback to AJAX via jquery');
        $.ajax({
            url: myURL,
            jsonp: "callback",
            cache: true,
            dataType: "jsonp",
            data: {
                page: 1
            },
            success: function(response){
                if (response && response[0]){
                    sensor.data = response[0];
                    sensor.fullData = response;
                    printData();
                }
            }
        });
    }
}

function printData(){
    if (sensor && sensor.data) {
        // Display the info.
        html = '<h1>Sensor Data</h1>'
        + '<br /><div id="time">Time  ' + sensor.data.timestamp + '</div>'
        + '<div id="hum">Humidity ' + sensor.data.h + ' % (rel)</div>'
        + '<div id="temp">Temperature ' + sensor.data.t + ' celcius</div>'
        + '<img src="' + sensor.image + '" />'
        } 
    else {
        html = '<h1>Sensor Data</h1>'
        + '<br />Sorry, sensor data not available right now :(</br>'
        + '<img src="' + sensor.image + '" />'
    }
    document.getElementById("printHere").innerHTML= html;
}


</script><button onclick="history.back()">Back in browser history</button><br />

<button onClick="getJSON();">Retrieve some sensor data</button>
<div id="printHere"></div>
</body>
</html>

Dialog IoT Sensor Starter Guide

$
0
0

Dialog SemiconductorThe SmartBond™ IoT Sensor Development Kit makes developing motion and environmental sensing applications easy. Merging cutting-edge Bluetooth® Smart hardware, sensors and sensor fusion software, it enables the world’s lowest power 12 Degrees-of-Freedom (DoF) wireless sensor module. Highly integrated, it cuts system size and cost and includes all essential hardware and software to speed creation of advanced IoT devices.

This complete development platform developed by Dialog on the basis of Bosch Sensortec sensors, combines Bluetooth wireless communications and an ARM Cortex-M0 processor with an accelerometer, gyroscope, magnetometer and environmental sensors. All this on a board measuring just 16 x 15 mm.

IoT Sensor Starter Guide

Evothings Studio is a development tool that makes it easy to create mobile apps for the Internet of Things (IoT) in JavaScript and HTML. In this tutorial you will learn how to create a mobile application for Dialog’s IoT Sensor using the Evothings Workbench.

You can order your own IoT Sensor via Digi-Key. For other distributors, visit the website.

Dialog IoT Sensor moduleDialog Semiconductor’s IoT Sensor is a 12-DOF wireless sensor module development platform.

  • DA14583 low-power Bluetooth Smart SoC
  • BMI160 6-axis inertial measurement unit (accelerometer and gyroscope)
  • BMM150 3-axis geomagnetic field sensor (magnetometer)
  • BME280 integrated environmental unit (pressure, temperature and humidity)

The sensor also includes SmartFusion™, Dialog’s unique smart sensor fusion software library for data acquisition, sensor calibration and fusion. Ideal for resource-constrained systems, it minimizes memory, processing requirements and power consumption.

By the end of this tutorial your app can connect to the IoT Sensor and display the accelerometer data graphically. Some experience with Evothings and JavaScript is required. Follow the Getting Started to learn more.

Prerequisites

Libraries

Download the following JavaScript libraries from GitHub

Hardware

  • Mobile device connected to Evothings Workbench
  • Dialog IoT Sensor, running the latest SFL firmware

For more information about installing new firmware on your IoT Sensor, see the user manual on Dialog’s Customer Support site (registration required).

Create a new application

Start by creating a new application in the Evothings Workbench. For this tutorial, we will name our app ‘Dialog IoT Sensor’

Dialog IoT Sensor - Create new app

In the ‘My Apps’ tab of the Workbench, click the ‘CODE’ button to find the source for the app. Edit the index.html file in your favourite text editor such as Notepad++ and look for the line

<title>Basic Template App</title>

Change the title to your liking (we will use ‘Dialog IoT Sensor’). This changes the app name displayed in the ‘My Apps’ screen

Include the libraries

To be able to connect to our IoT Sensor, we must first include the libraries we downloaded earlier.

In the ‘libs’ folder, create a new folder called smoothie and copy smoothie.js

In the ‘libs/evothings’ folder, create three new folders called easyble, dialog-iotsensor and util. Copy the corresponding JavaScript files to these folders.

Dialog IoT Sensor libraries 1

Dialog IoT Sensor libraries 2

After copying the files, it is time to add some functionality to our application using JavaScript.

Manually add a new JavaScript file (app.js) to the root folder of the application.

Dialog IoT Sensor libraries 3

Include the app.js and iotsensor.js files in index.html.

Find the following line in index.html

<script src="libs/evothings/ui/ui.js"></script>

Add these lines to load app.js and iotsensor.js when the application runs.

<script src="libs/evothings/dialog-iotsensor/iotsensor.js"></script>
<script script src="app.js"></script>

Initializing

The following lines of code will initialize everything we need to use the IoT Sensor library.

In app.js, add a new event listener. This will call the initialize function when all libraries are loaded.

document.addEventListener('deviceready',	
	function() { evothings.scriptsLoaded(initialize) }, false
);

In app.js, create a new global variable named ‘iotsensor’. This object will contain all functions and variables regarding the IoT Sensor.

var iotsensor;

Add a new function ‘initialize’. This function initializes the ‘iotsensor’ object and stores it for later use

function initialize() 
{ 
	console.log("Initialize function called"); 
	iotsensor = evothings.iotsensor.createInstance(evothings.iotsensor.SFL);
}

Connecting

In index.html, add a new button which calls the ‘connect’ function when clicked. This function will automatically connect to the closest IoT Sensor available.

Find the following lines in index.html

<h1>TODO: Add app title</h1>
<p>This is a basic template for an Evothings app.</p>

Now replace these lines to create a new button

<button class="blue wide" onclick="connect()">Connect</button>

In app.js, create a new function called ‘connect.

This function uses the iotsensor object to automatically connect to the closest IoT Sensor available. If your mobile device does not connect, check the IoT Sensor to make sure it is advertising (blue LED blinking)

function connect()
{
	iotsensor.connectToClosestSensor(
		7500, // Scan for 7500 ms
		function()
		{
			console.log("Connected to IoT Sensor");
		},
		function(error)
		{
			console.log('Disconnect error ' + error);
		}
	);
}

When the connection is successful, it will ‘Connected to IoT Sensor’ to the log. If for some reason the connection is lost, a disconnection error is sent to the log. Once connected, the blue LED stops blinking.

Receiving data

Now that we are connected to the IoT Sensor, it is time to read the data from the sensor.

In index.html, add a second button to turn on the accelerometer.

<button class="blue wide" onclick="accelerometerOn()">Accelerometer On</button>

In app.js, add a new function called ‘accelerometerOn’ to turn on the accelerometer when the button is pressed.

function accelerometerOn()
{
	iotsensor.accelerometerOn();
}

To receive data, we must first set a callback function, in the ‘initialize’ function, add the following line

iotsensor.accelerometerCallback(handleAccelerometerData);

This function will be called everytime new data is available.

Now add the ‘handleAccelerometerData’ function to app.js

function handleAccelerometerData(data)
{
	console.log('x: ' + data.x + 'y: ' + data.y + 'z: ' + data.z);
}

Data from the accelerometer is automatically converted to the correct unit measurement and passes to the function.

If you are connected to the IoT Sensor and the accelerometer is turned on, it will output the values to the console.

Dialog IoT Sensor accelerometer log

Visualizing data

As you may have noticed, the log is flooded with data. We will now visualize this data in a graph using the Smoothie.js library we downloaded earlier.

First, create a new 300×200 canvas in index.html

Below ‘Accelerometer button’, add the following line:

<canvas width="300" height="200" id="chart_canvas"></canvas>

Also, we need to include the Smoothie Chart library.

Add the following line to index.html, and make sure it is above the ‘include app.js’ line

<script src="libs/smoothie/smoothie.js"></script>

In app.js, declare a chart variable and three line variables.

Below ‘var iotsensor’, add the following global variables

var chart = new SmoothieChart({minValue: -2, maxValue: 2});
var line_x = new TimeSeries();
var line_y = new TimeSeries();
var line_z = new TimeSeries();

Add a new function called ‘initializeChart’.

In this function we will initialize a new chart and redirect the data to the canvas using the variables we just created.

function initializeChart()
{
	chart.streamTo(document.getElementById("chart_canvas"));
	chart.addTimeSeries(line_x);
	chart.addTimeSeries(line_y);
	chart.addTimeSeries(line_z);
}

We want to initialize the chart as soon as the device is ready.

Add the following line to the ‘initialize’ function to initialize the chart.

initializeChart();

Dialog IoT Sensor walktrough app 1

Your app will now show an empty graph. In order to see the accelerometer data in our graph, we must write our data to the line variables we declared earlier.

Add the following lines to the ‘handleAccelerometerData’ function

var now = Date.now();
line_x.append(now, data.x);
line_y.append(now, data.y);
line_z.append(now, data.z);

Save your changes and connect to the IoT Sensor. Enable the accelerometer and your app should look like this:

Dialog IoT Sensor walktrough app 2

As you may have noticed, it is hard to keep track of which line corresponds to which axis. The Smoothie Chart library provides functionality to change the appearance of the lines. You can do so by replacing the ‘addTimeSeries’ lines in app.js

chart.addTimeSeries(line_x, {lineWidth:3, strokeStyle: "rgb(255, 0, 0)"});
chart.addTimeSeries(line_y, {lineWidth:3, strokeStyle: "rgb(0, 255, 0)"});
chart.addTimeSeries(line_z, {lineWidth:3, strokeStyle: "rgb(0, 0, 255)"});

This will color the lines as follows:

  • line_x: red
  • line_y: green
  • line_z: blue

Dialog IoT Sensor walktrough app 3

For more information about Smoothie Charts, see the website or use the builder to create your own charts!

Evothings Instrumentation

Evothings Studio alpha version 2.1.0 introduces a new feature known as ‘Instrumentation’. This feature allows us to pass data back to our Workbench for more advanced logging.

Note: This feature is currently only available as an early release for testers and enthusiasts. To use this feature, download the latest alpha release and make sure you are using at least version 1.3.0 of the Evothings Viewer App.

For more information about the instrumentation feature, read the tutorial.

This part is not mandatory for a function app, but provides extra insight about the Evothings Studio

In this part, we will push the accelerometer data to our desktop and display the data graphically in our Evothings Workbench.

In order to add a new graph in our Instrumentation Viewer, create a new button in index.html

<button class="blue wide" onclick="initWatcher()">Instrumentation</button>

This button will call the ‘initWatcher’ function.

Create the ‘initWatcher’ function in app.js

function initWatcher()
{
	window.accel_xyz = 0;
	window.evo.watcher.watch('acceleroPlot', window, 'accel_xyz', 'plot');
}

This function adds a new watch called ‘acceleroPlot’ under our watcher in the instrumentation view.

The watcher looks for the variable ‘accel_xyz’. In order for the watcher to see updates of the data, we must pass the accelerometer data to ‘accel_xyz’.

In the ‘handleAccelerometerData’ function in app.js, add the following line:

window.accel_xyz = data;

In order to load and use the instrumentation tools, you must follow the following sequence:

  1. Connect the Viewer app to the workbench.
  2. Run the application by pressing the ‘RUN’ button.
  3. Open the ‘Viewers’ tab (upper-right corner).
  4. In the new window called viewers, click ‘START INSTRUMENTATION’.
  5. Click ‘watch’ next to the small gear.
  6. Click ‘watches’.
  7. In the app, click ‘INSTRUMENTATION’. This loads our graph.
  8. On your desktop in the viewers window, click ‘acceleroPlot’.

This will show an empty graph in the viewers window. Now connect to your IoT Sensor using the ‘CONNECT’ button and turn the accelerometer on!

Dialog IoT Sensor instrumentation viewer 1

The instrumentation tool offers lots of functionality, for example, try to expand the code to see graphs for all the different sensors as shown below:

Dialog IoT Sensor instrumentation viewer 2

Learn more

So far you have learned

  • How to include libraries in your project
  • How to connect to your IoT Sensor
  • How to enable the sensors on your IoT Sensor
  • How to read the data from those sensors
  • How to visualize the data in a chart
  • How to use the new Evothings’ instrumentation tool

Now try to build your own app, but this time, use the gyroscope or temperature sensor to visualize the data!

The Dialog IoT Sensor library also includes functionality to change any of the settings of your IoT Sensor. See the README or documentation to learn more!

Also, check out the IoT Sensor App. This app is able to display all the sensor data and change the settings of the sensor using the IoT Sensor library!

app.js

The entire JavaScript code only consists of 58 lines:

document.addEventListener('deviceready',	
	function() { evothings.scriptsLoaded(initialize) }, false
);

var iotsensor;

var chart = new SmoothieChart({minValue: -2, maxValue: 2});
var line_x = new TimeSeries();
var line_y = new TimeSeries();
var line_z = new TimeSeries();

function initialize() 
{ 
	console.log("Initialize function called"); 
	iotsensor = evothings.iotsensor.createInstance(evothings.iotsensor.SFL);
	iotsensor.accelerometerCallback(handleAccelerometerData);
	initializeChart();
}

function initializeChart()
{
	chart.streamTo(document.getElementById("chart_canvas"));
	chart.addTimeSeries(line_x, {lineWidth:3, strokeStyle: "rgb(255, 0, 0)"});
	chart.addTimeSeries(line_y, {lineWidth:3, strokeStyle: "rgb(0, 255, 0)"});
	chart.addTimeSeries(line_z, {lineWidth:3, strokeStyle: "rgb(0, 0, 255)"});
}

function initWatcher()
{
	window.accel_xyz = 0;
	window.evo.watcher.watch('acceleroPlot', window, 'accel_xyz', 'plot');
}

function connect()
{
	iotsensor.connectToClosestSensor(
		7500, // Scan for 7500 ms
		function() { console.log("Connected to IoT Sensor"); },
		function(error) { console.log('Disconnect error ' + error); }
	);
}

function accelerometerOn()
{
	iotsensor.accelerometerOn();
}

function handleAccelerometerData(data)
{
	console.log('x: ' + data.x + ' y: ' + data.y + ' z: ' + data.z);
	var now = Date.now();

	line_x.append(now, data.x);
	line_y.append(now, data.y);
	line_z.append(now, data.z);

	window.accel_xyz = data;
}


Evothings Studio 2.1.0

$
0
0

After 3 months of coding and testing we are pleased to announce the stable version 2.1.0 of Evothings Studio!

This release packs quite a lot of new interesting features and improvements so there is no reason to not upgrade!

Here are all the gory details, but feel free to just dive in!

Move to Electron

With 2.1, we decided to move to Electron, a new strong base for building web based desktop applications pioneered by Github and exploding in popularity. Electron is today used by several others too, like Slack, Visual Studio Code and Atom.

This gives us more opportunities in integrating cleanly with the desktop in a cross platform way. It also opens up interesting integration paths with other high profile projects like VSCode, Atom etc.

New proper Installers

We now finally have new proper installers – a standard dmg for OSX, “one click” Squirrel based installer for Windows and a Debian package for Linux. This makes it more streamlined to install, reinstall and uninstall Evothings Studio.

We will also soon prepare good old zip archives since we have received a request for keeping those around.

Cloud Token and Licenses

In order for us to get a better grip on how our cloud resources are used, but also as a first step towards offering commercial subscriptions of Evothings, we are now requiring all users to get a “Cloud Token” from our website and then enter that token into Evothings Studio. This acts as an identity of the installation but is still fully anonymous.

Later on in august, commercial licenses will be available for subscription. Until then Evothings Studio 2.1 is still fully unlimited just as Evothings Studio 2.0. Starting in august a few functions will be capped, while the Forever Free version will always let you access all the basic services without cost just like today.

Web Bluetooth Support

Web Bluetooth is a standards initiative by the W3C Web Bluetooth Community Group to create a standard JavaScript API for BLE communication.
Originally designed to enable apps running in web browsers to communicate with BLE devices, the Web Bluetooth API is now also available for mobile apps built with Apache Cordova which is the base platform of Evothings.

The Web Bluetooth API specification makes use of ECMAScript 6, a new version of JavaScript that features a new function closure syntax and a whole slew of other improvements. You can write Web Bluetooth applications using ECMAScript 5, but the code becomes more readable with ECMAScript 6.

Mikael Kindborg has for 2.1 implemented support for both Web Bluetooth and ECMAScript 6.

To bring Web Bluetooth to mobile apps, Mikael teamed up with Rob Moran (@thegecko), who works in the mbed team at ARM and is part of the W3C Web Bluetooth Community Group. Rob has created Bleat Bleat, which offers libraries and a pluggable architecture for BLE APIs in JavaScript, and thanks to Bleat, we now have good Web Bluetooth support in Evothings Studio.

Bleat is included with the two new example apps that uses Web Bluetooth.

ECMAScript 6

ECMAScript 6 or ECMAScript 2015, or simply ES6, is a new version of the JavaScript language. ES6 has several new features (such as arrow functions) that fit nicely with the Web Bluetooth API.

ES6 is not yet widely supported natively on mobile devices but Mikael solved that by including the Babel compiler in Evothings Studio. When you click the Run button in the Workbench, ES6 source files are transparently translated to ES5, and your app launches as usual on connected mobile phones.

Run the example Hello ECMAScript 6 to see ES6 in action.

Visit the ECMAScript 6 documentation page to learn more.

Instrumentation

What goes on on-board the mobile device during development, prototyping and testing? How can you probe what a bluetooth radio can see in terms of other devices and services? In the Evothings Workbench, there is such an option nowadays, as well as the ability to conditionally inject files into the code running on the phone or tablet for various purposes – the sky is the limit. One of the most interesting additions to Evothings Studio in this release is the Instrumentation window. It’s a game changer, we can sense it, while it might be hard to grasp even for us all the possibilities enabled.

instrumentation

You have to see it for yourself, just open the Viewers window reachable by clicking the “Viewers” button in the top right corner of the Workbench and learn more about it here.

Note that the instrumentation feature is one of the things we are offering in our commercial package. This means you can still try it out in the free version of Evothings Studio, but there will be limitations in place starting 1st august.

Online Examples

With this version of Evothings Studio all Examples are hosted online and downloaded on demand when being Run or Copied. This means new examples will show up without you having to install a new release of Evothings Studio. The Workbench actually refreshes the lists every 30 minute, or if you restart the Workbench.

Libraries

We are also adding a mechanism to easily pick and choose from Libraries to use in your application. To begin with jQuery is available in this form, but we are now adding all our own libraries in the same way – and can add more external libraries too. The Libraries list and the libraries themselves are hosted online just like the examples are.

libs

The way you add or remove a library to an application is through the new Edit button which opens up a dialog where you can edit metadata for the app, and configure what libraries to use. When adding a library this way it’s also added as a script tag in the index.html file, right before the closing head tag.

Extended metadata for Apps

We have added several new fields in evothings.json for Apps:

  • name – a short name used in tools and as directory name etc.
  • description – a one paragraph description of the app.
  • version – a version string not containing spaces.
  • tags – string tags of different types (license, vendor, platform, comm, protocol)
  • libraries – a name + version pair representing a used Library in your application

The mentioned Edit button opens a dialog to modify these metadata, although all of these fields are not yet in the dialog.

Several new examples

Since the stable version 2.0.0 a bunch of new examples have been created:

  • Three new micro:bit examples
  • Two new Adafruit Bluefruit LE UART examples
  • An example for Arduino 101
  • Three new Dialog examples
  • One new MediaTek LinkIt Smart 7688 Duo example
  • One new Raspberry Pi 3 example

Each example has its own documentation page, so just click the “Doc” button to find out details.

Repository URLs

We have also added the ability for Evothings Studio to load Examples and Libraries from additional online repositories in addition to our own at Evothings.com. There is a setting called “Repository URLs” and there you can add one or more extra base URLs where examples and libraries are hosted. More details on how you can host apps and libraries are forthcoming, but until then contact us on gitter for instructions on how to do this.

A new Support portal

In order to better serve our open community as well as our commercial customers we decided to use Freshdesk for support tickets, discussion forums, knowledge base and more – you can find our support portal at https://evothings.freshdesk.com. It doesn’t matter if you are a paying customer or not – the support portal is open for all and you can easily login using Facebook, Google or Twitter or just make a regular email based signup.

fresh

However, if you do decide to get a commercial subscription we have SLAs to govern our support process for your tickets.

All relevant entry points to our support portal can also be found conventiently inside Evothings Studio in the Help->Support sub menu.

Several smaller improvements

And we’ve also done some housekeeping;

  • Added a “Disconnect all viewers” function in the menu
  • Added a “Doc” button to all apps and libraries that opens a documentation URL in the external browser
  • Made so that the “Code” button opens up the folder of the app itself, and not its parent folder
  • Improved error handling when network is bad or offline
  • Improved look and feel of main Workbench window using Bootstrap tabs
  • About dialog now shows build timestamp and license including limits.

Coming next…

We have a lot of ideas on where to go next with Evothings Studio, but do come and talk to us with your ideas too! The best place to reach us live is gitter, but we also have a brand new forum up which you can also use.

Hope you like this release of Evothings Studio!

regards, The Evothings Team

Questions & Answers? – Visit the Evothings Forums
https://evothings.freshdesk.com/support/discussions

Our Gitter chat room, where we hang out, all developers welcome to join!
gitter.im/evothings/evothings

Our IRC channel on Freenode (old school and may be empty!)
webchat.freenode.net/?channels=evothings

Publishing sensor data onto the IBM Watson IoT platform

$
0
0

Bluemix IoT Cloud with TI SensorTag

Storing event data in a secure and stable cloud is a necessity for many IoT deployments. Imagine having a network of devices that are concurrently collecting ambient temperature, humidity and light levels at an industrial plant. All of these devices will generate events that are required to be captured and stored. Typically, this network of devices would need one or a couple gateways for them to talk to the cloud hosting provider.

In this tutorial, we will demonstrate how to collect sensorial event data using our old-time favorite the Texas Instrument CC2650 SensorTag device; using a HTML5-based mobile app as gateway and subsequently publishing its data to the IBM Watson IoT platform. This set-up provides you as a developer with all the necessary building blogs for a dedicated set of tools to work with Internet of Things. The IoT platform is a part of IBM Bluemix cloud services.

Setting up IBM Bluemix account and Watson IoT platform

To get started, follow these steps:

  1. Register and/or login for a free IBM Bluemix account.
  2. Once logged in, click on “Use Services or APIs”. You’ll now see an extensive list of services, scroll down and click on “Internet of Things” checkbox from the left-hand pane and click on “Internet of Things Platform”.Choose "Internet of Things" from left side panel
    (direct link here too, in case you got lost: https://console.ng.bluemix.net/catalog/services/internet-of-things-platform)
  3. On the next screen, you’ll find a brief about Internet of Things Platform in general and a few options on how to get started. For this demo; just leave everything as it is and click on “Create”.
    Leave all options and click "Create" Leave all options and click “Create”
  4. After a short set-up time, on the next screen, you will notice that a new IoT Platform service has been created for you. Now just click on the “Launch dashboard” button. You will be presented with an overview of your account. From here, click on “Add device” button under “Device Types” panel.

    Adding a device to the Bluemix IoT cloud

  5. You will be presented with a pop-up to add new device type. Note that these are your device types, as you want to declare them so you can name and describe them in any way you want. For the purpose of this tutorial, I defined a device type called “CC2650”, you can call it anything you please, I guess. Fill in all other optional inputs if you want them or just leave them and finish the process to create a new device type.
    Create a new device type
  6. As you finish, a new pop-up will start that will guide you to add your device by using the “device ID”. Choose any alphanumeric string to be your device ID.
  7. At the end of the process, you will see your organization ID, device type and device ID. Make note of these values as they will be used in our app. Also the authentication token is good to have jotted down somewhere (you can always to back any time and look too).

    E.g. Org ID “x******”, Device Type “CC2650” and device id “1001”
    The organisation ID is generated for us, while the other two you make up yourself.

  8. Now close the popup and click on “Access” option from the left-hand menu, then choose “api keys” from the sub-menu on the page that open. From here, click on “+ Generate API Key” button.
  9. On the next popup, you will see your “API Key” and “Authentication Token”, note these values.

Congratulations, you’ve now done all of created an IBM account, registered a Watson IoT platform service, added a device and generated API key and authentication token to use them with our app. Now is really time we start developing the mobile app that will collect data from TI SensorTag publish it to our new account at IBM Watson IoT platform.

Developing the app with Evothings Studio

We will be using Evothings studio to rapidly prototype our app. Evothings studio is built with Cordova and allows quick development through the auto-reload mechanism. It’s a robust platform that allows you to develop apps for your IoT devices using HTML, CSS and JavaScript.

To get started with Evothings Studio, follow these steps:

  1. Download the latest version of Evothings Workbench.
  2. Download Evothings Viewer app on your mobile phone. (iOS, Android).
  3. Connect the Evothings Workbench with Evothings Viewer app.
  4. Click on “Examples” tab in the Evothings Workbench and run “Hello World” example to see the working of Evothings Studio.

Now you know Evothings Studio, let’s download the example app code for this tutorial and run it with Evothings Studio.

  1. Clone or download the example app code from this GitHub repository.
    https://github.com/hammadtq/Evothings-Demo-Apps/tree/master/bluemix-iot-cloud-CC2650
  2. Open the downloaded folder, find the “index.html” file and drag-drop it onto the “My Apps” tab in Evothings Workbench, a new project entry link will be created.
  3. Open the “app.js” file from the downloaded folder and input your Watson IoT platform service credentials you saved previously.
  4. Run the example project from Evothings Workbench by pressing “Run”.
  5. Power up your TI SensorTag (hold down the side button until it starts blinking) and press the “Connect” button in the app on your phone. The app will now scan and connect (in this demo to the first SensorTag it finds), effectively filtering off other device types. The app is currently configured to upload the ambient temperature, humidity and light readings as an event data to the IoT platform every 6 seconds. You can change all these parameters relatively easy.
  6. Open the IoT platform in your browser, click on the graph icon alongside the device listing and check if it’s registering incoming events.

Code Explanation

The example app code is using MQTT as the transfer protocol instead of HTTP. MQTT is a specialized protocol designed specifically to facilitate IoT device data transfers. We are using MQTT API of IBM Watson IoT platform. You can read more about MQTT terms such as “publish”, “topic” and “subscribe” here.

To work with MQTT we are using Paho JavaScript client library. All of MQTT implementation is done in “app.js”. We connect to the IoT platform using “app.setupConnection” function, once established the Paho library holds the connection, waiting for you to either publish or retrieve data from the cloud. When we have event data to publish, we send it to “app.publish” function as a JSON string from index.html which in turn publishes the data to the IBM Watson IoT platform.


JavaScript apps for the MediaTek LinkIt Smart 7688 Duo

How to develop mobile apps for Bluetooth Low Energy in JavaScript

$
0
0

Evothings Studio makes it easy to develop real mobile apps in JavaScript, also for distribution via the official app stores. This guide provides an overview of how to develop mobile apps using the smartphone’s Bluetooth Low Energy (BLE) capabilities. We’ll give you pointers to our latest tutorials and libraries, all ready to deploy and use with your Cordova application.

Evothings support for BLE

Evothings Studio comes with support for BLE out-of-the-box. There are two main software components for BLE:

  • The Cordova BLE plugin, which provides native access to BLE capabilities and a JavaScript interface.
  • The EasyBLE library which is a high-level library for coding BLE apps in JS. EasyBLE is an add-on library available on GitHub: easyble.dist.js

The Cordova BLE plugin

mbed-nordic-nrf51-dkThis plugin is ready to use in a Cordova application and comes pre-installed with Evothings Viewer. Resources:

The EasyBLE library

EasyBLE is a library written on top of the Cordova BLE plugin, which provides high-level functions for scanning, connecting, reading and writing BLE devices.

How to get started

Use Evothings Studio and Evothings Viewer to to get started quickly with writing apps that use BLE. (Evothings Viewer is itself a Cordova application, which you can customize if required.)

Read the tutorial How to connect to BLE devices to get an introduction to the EasyBLE API.

You can also install the BLE plugin in a custom Cordova app, add the plugin with this command:

cordova plugin add cordova-plugin-ble

To use EasyBLE, download the file easyble.dist.js and include it in index.html:

<script src="easyble.dist.js"></script>

Documentation and links

RedBearLab.nRF51822

Call to action

Download Evothings Studio and reveal any hidden BLE devices near you – there may be more of them than you think!

youtube_ble_example_start

With Evothings Studio it is easy to get started with developing mobile apps for Bluetooth Low Energy and the Internet of Things!

Charting IoT sensor data using C3.js and IBM Bluemix

$
0
0
Line Chart using C3.js Library

Line Chart using C3.js Library

In a previous tutorial on Bluemix, we successfully published TI SensorTag readings to IBM Bluemix IoT cloud service using MQTT API and our mobile app that was developed Evothings Studio. In this tutorial, we’ll use the same sensor device from Texas Instruments, adding to the mobile app a JavaScript chart library for visualising the SensorTag readings on a line chart in real-time while being published on the IBM Bluemix cloud.

Storing sensor readings on cloud and visualizing them in an intuitive way, is an cornerstone for any IoT installation. Neatly displayed data allows the end-user to understand the readings and plan accordingly – making better decisions. Another important requirement with IoT is that since sensor data often arrives continuously around the clock so any visualization should have the ability to update itself in real-time.

For this tutorial, we will be using C3.js library which is specifically designed to use with mobile apps and has the capability of updating itself in real-time using live data. For the purpose of this example, we will use the simple Line Chart example of C3.js.

Using Evothings Studio

We’ll be using Evothings Studio to develop our mobile app. If you have followed the first part of this tutorial, you’ve already had Evothings Studio up and running. If not, just follow these steps and get going with the example app code using your IBM Bluemix IoT cloud service credentials (if you don’t have them, please see the part 1 of this tutorial for detailed instructions on how to get them):

  1. Download Evothings Workbench.
  2. Download Evothings Viewer app on your mobile phone. (Android, iOS)
  3. Connect Evothings Workbench with Evothings Viewer using the connection key.
  4. Download/clone the hammadtq/Evothings-Demo-Apps GitHub repository.
  5. Find “visualization-bluemix-iot-cloud” folder in the download repository, open it and then drag-drop the “index.html” to the “My Apps” tab of Evothings Workbench on your computer. This will create a new entry for the project, at the very top.
  6. Now open “app.js” in your favorite text editor and update the variables to suit your Bluemix IoT service organization ID,  API key, authentication token, device type and device ID.
  7. Click the “Run” button which is displayed to the right of your new project entry, and Evothings Viewer app will now load the example app code.
  8. Activate your CC2650 TI SensorTag, by pressing the side button.
  9. Finally, pess the “Connect” button on the app, the “Communication status” should change to SCANNING and then finally to SENSORTAG_ONLINE. You’ll now see the temperature, humidity and light (lux) meter readings on yoru app as well as graphing data updating on the C3 chart in real-time.

Code Explanation

Analyze the “app.js” file again. All the MQTT and visualization magic is happening here. When the app initializes, the code in app.onReady function sets up the connection with the Bluemix IoT cloud service. Within the same function, we are initializing the C3.js chart starting off with zero values for our desired columns.

//generate the initial chart
app.chart = c3.generate({
bindto: '#chart',
data: {
   columns: [
     ['Ambient Temp', 0],
     ['Humidity', 0],
     ['Light', 0]
  ]}

By pressing the “Connect” button, the app starts publishing the sensor readings to the Bluemix IoT cloud service. As we are also subscribing to the all devices on the Bluemix IoT cloud, that means whenever any device receives any data, the Bluemix MQTT API notifies our MQTT client, the client then sends it to the “app.onMessageArrived” function.

The data message is received in JSON format. In “app.onMessageArrived”, the JSON ia parsed and starts updating the chart using following code:

var payload = jQuery.parseJSON(message.payloadString)
app.ambientTemp.push(payload.ambientTemp)
app.humidity.push(payload.humidity)
app.light.push(payload.light)
app.chart.load({
  columns: [
    app.ambientTemp,
    app.humidity,
    pp.light
  })

All of app.ambientTemp, app.humidity, app.light are arrays which were declared earlier in same file. So, with every message arrival, the arrays get updated and then reloaded onto the chart.

I hope that with this tutorial, you will be able to develop cloud- and visualization integration for your IoT apps. In case of any questions or comments, you are always welcome to use our forum at Evothings Forum.

Get Evothings Studio from the download page (Workbench part) and mobile Viewer clients from Apple iTunes and Google Play (look for “evothings viewer”), start making mobile apps in javascript today!

Visualizing acclererometer data using IBM Watson IoT Platform and Smoothie Charts javascript library

$
0
0

Visualization is an important part of any IoT deployment, especially when you are using sensors such as temperature, humidity, light etc. Plotting sensor data on a live updating line chart is what we discussed in our second installment, however, if you have a more continuous form of data incoming, such as a stream, you may want to visualize it as a live-updating continues line chart. Smoothie Charts, a JavaScript charting library, proves to be a good library to visualize streaming data.

IBM Watson IoT Platfrom with SmoothieIn this third article of “publishing using IBM Bluemix” tutorial series, you will learn about visualizing IBM Watson IoT platform data using Smoothie Charts – a common JavaScript charting library for visualising real-time data streams. To bring you up to speeed, you can start off by reading part 1 and part 2 of this article series.. There is also a relevant, older article on the subject written by G&oul;ran Krampe.

Previously, we were using TI SensorTag for sensor readings, however, as its possible that you may not have that particular sensor module, I have modified this tutorial to use your smartphone’s accelerometer readings. So, in this tutorial, we will read the accelerometer readings, publish them to the IoT platform, retrieve the published readings and then visualize them as a streaming line chart.

Publishing sensor data to IBM Watson IoT platform was covered in the first installment of this tutorial series. However, for continuity’s sake, I am again copying the steps necessary to create your own IoT Platform service on IBM Bluemix. If you are interested in learning the working of IBM Bluemix MQTT API and how we are communicating with API using Paho JavaScript library, please still refer to the first installment of this series..

Step 1: Setting up IBM Bluemix account and Watson IoT platform

To get started, follow these steps:

  1. Register and/or login for an IBM Bluemix account.
  2. Once logged in, click on “Use Services or APIs”.
  3. You will see a huge list of services, click on “Internet of Things” checkbox from the left-hand pane and click on “Internet of Things Platform”.
    Choose "Internet of Things" from left side panel

    Choose “Internet of Things” from left side panel

  4. On the next screen, you will see a brief about Internet of Things Platform and a few options to get started, leave everything as it is and click on “Create”.
    Leave all options and click "Create"

    Leave all options and click “Create”

  5. On the next screen, you will notice that a new IoT Platform service has been created for you. Now just click on “Launch dashboard” button.
  6. You will be presented with an overview of your account. From here, click on “Add device” button under “Device Types” panel.
    Adding a device to the Bluemix IoT cloud

    Adding a device to the Bluemix IoT cloud

  7. You will be presented with a pop-up to add new device type. Note that these are your device types, as you want to declare them so you can name and describe them in any way you want. For the purpose of this tutorial, I am just using a device type called “Accelerometer”. Fill in all other optional inputs if you want them or just leave them and finish the process to create a new device type.
    Adding a device type to IBM Watson IoT Platform

    Adding a device type to IBM Watson IoT Platform

  8. As you finish, a new pop-up will start that will guide you to add your device by using the “device ID”. Choose any alphanumeric string to be your device ID.
  9. At the end of the process, you will see your organization ID, device type and device ID. Make note of these values as they will be used in our app.
  10. Now close the popup and click on “Access” option from the left-hand menu, then choose “api keys” from the sub-menu on the page that open. From here, click on “+ Generate API Key” button.
  11. On the next popup, you will see your “API Key” and “Authentication Token”, note these values.

By now, you have created an IBM account, registered a Watson IoT platform service, added a device and generated API key and authentication token to use them with our app. Now is the time we start developing the mobile app that will collect data from phone’s accelerometer and publish it to our new account at IBM Watson IoT platform.    

Step 2: Developing the app using Evothings Studio

Evothings Studio is a rapid mobile app prototyping tool for IoT applications. The studio itself is based on Apache Cordova and gives you the power to develop the cross-platform apps quickly while using widely known scripting language of HTML and JavaScript.  

To get started, follow these steps:

  1. Download the latest version of Evothings Workbench.
  2. Download Evothings Viewer app on your mobile phone. (iOS, Android).
  3. Connect the Evothings Workbench with Evothings Viewer app.
  4. Click on “Examples” tab in the Evothings Workbench and run “Hello World” example to see the working of Evothings Studio.

Now you know Evothings Studio, let’s download the example app code for this tutorial and run it with Evothings Studio.

  1. Clone or download the example app code from this GitHub repository.
  2. Open the downloaded folder, find the “index.html” file and drag it to the “My Apps” tab in Evothings Workbench, a new project entry will be created.
  3. Open “app.js” file from the downloaded folder and input your Watson IoT platform service credentials.
  4. Run the example project from Evothings Workbench.
  5. Tilt the phone to see changing values of the accelerometer on Smoothie streaming chart. Note the slight delay between when you tilt the phone and when the lines start updating themselves, that is because we are first publishing the data to IoT Platform and then retrieving and plotting it on the app.
  6. Go back to the IBM Watson IoT Platform service dashboard and click on graph icon alongside the device listing to see the incoming events.
    Incoming events in IBM Watson IoT Platfrom

    Incoming events in IBM Watson IoT Platfrom


Step 3: Understanding the code

Open “index.html” from the downloaded app code in your favorite code editor. Note that upon initialization, the initialiseChart function plots and initialize Smoothie chart. After that, the accelerometer gets initialized, we start watching the accelerometer readings using watchAcceleration function from Device Motion Cordova plugin.

Once, we have the accelerometer readings in accelerometerHandler, we make a JSON string of them and send them for publishing to MQTT library.

Now, open “app.js” and note the app.onMessageArrived function, this is where we receive the data from IoT Platform as it get published then we parse the JSON and update the readings on our Smoothie chart.

If you want to discuss this tutorial or have any questions, feel free to use Evothings Forum where a large community is available to help you!

Get Evothings Studio from the download page (Workbench part) and mobile Viewer clients from Apple iTunes and Google Play (look for “evothings viewer”), and join in!

JavaScript mobile apps for your NXP Hexiwear BLE device

$
0
0

Screen Shot 2016-08-19 at 12.00.46This article is all about connecting your NXP Hexiwear device to an iOS or Android phone or tablet using Bluetooth Smart (BLE). The Hexiwear is a multi-sensor device based on the ARM Cortex M4 architecture, with a sidekick ARM M0 for the BLE connectivity and an on-board array of sensors in order to become aware of the world around it.

At 120 MHz, and with 1M Flash and 256K SRAM, there is a wide range of things you can do with it, and there is a range of other product modules to extend its functionality as well, via the Hexiwear docking station. By connecting to a phone over BLE opens up for more new functionality, and it can be done easily in javaScript using Evothings Studio.

plugins_hexiwear

Tips: NXP is running a Kickstarter Challenge, a competition on the subject ending on September 30, where you can showcase your mobile IoT skills and win fame and prizes.

At Evothings, we wanted to give it a go, starting off with a small open-ended kitchen sink project reading accelerometer data, for you to easily modify and make various projects from. It’s released as open source, under the Apache 2 license, so the code is yours to use and modify. In order to follow this step-by-step article, you’ll need a computer with Evothings Studio and internet connection, a smartphone with the Evothings Viewer app installed and of course a charged Hexiwear device. We’ll connect the Hexiwear to your phone, and read some accelerometer data off the Hexiwear board in realtime. Thanks to Andreas Lundquist at Stockholm Makerspace who wrote the code for this project.

Getting Evothings Studio up and running

  1. Download the Studio Workbench desktop application from evothings.com/download, and while you’re lingering on that page, also generate your Cloud Token which will be your desktop (anonymous) identity, and allows you to connect to the Evothings cloud services. Start the Workbench, and enter the Cloud Token in the Connect tab. You’re now connected to the cloud services.
  2. Click GET KEY – which generates a key for connecting clients (phones & tablets) to the Workbench. Download the Evothings Viewer app from the app stores, enter the connect key and press CONNECT. We’re up and running! Go to the Examples tab and press the RUN button for the Hello World project, to see it load on your connected phone(s).

Running the Hexiwear project

Screen Shot 2016-08-19 at 09.37.32

Start by downloading any (or all) of these example projects (zip files)

Then add this project to your Workbench. Adding new project to Evothings Studio is easy, just drag-n-drop the index.html file of your project to the Workbench to add it to the project list in My Apps. Note; one of the projects is written in the new EC6 (ecma script version 6) and for it to work on iOS properly, it needs to be compiled back to older JavaScript as webkit on iOS doesn’t do ES6 yet. Nota bene, for new javascript to work on old phones and tablets, you need to drag-drop the exothings.js to the Workbench and not the index.html file icon. If you accidentaly dragged the index.html, you can safely delete the Workbench entry and start over – it’s just a link and doesn’t delete any files or other resources!
Pressing RUN makes it compile and upload to clients in one go using the Babel library.
As mentioned, to execute the code on your mobile device, just press RUN to launch any of the Hexiwear demo project. Make sure your phone’s bluetooth is on and that your Hexiwear device is powered up; soon it connects and starts delivering accelerometer data to the graph in the app.

Now, the fun begins. Press CODE to see where your code is at, and open up the index.html file and change some of the text. When you save, the code running on the mobile device is updated in real time. No compiling or signing, since we’re changing code that runs inside the webcontainer of the app. Go into any file, including the images, and as soon as there is a change, the diff is synced with the cloud version to which your phone(s) subscribe. Shiny!


The code

An Evothings Studio project is created similar to your typical Apache Cordova or Phonegap project.
Screen Shot 2016-08-19 at 14.02.41
You’ll see an index.html file containing the document (DOM) structure and links to the bits and pieces involved, and the elements to be displayed in the app; input field for the device name, button for connecting, a paragraph to display status info plus a canvas object onto which the x,y,z acceleration graph is drawn. The app also uses local storage, and will remember the name of a connected BLE device, even after the you quit the app. Local store is much like cookies, and can store 50MB of data per domain, that the web container accesses.

<h1>HEXIWEAR</h1>
<h2>Enter name of your BLE device</h2>
 
<input id="deviceName" value="ChangeMe!!" type="text" />
<button id="connectButton" class="blue">Connect</button>

<p id="info"></p>
<canvas id="canvas" width="300" height="150"></canvas>

The action takes place in the app.js file, where all the dynamic objects and methods are declared. Here are some key structures from the app.js file:

app.onDeviceReady = function() {

	// Report status.
	app.showInfo('Enter BLE device name and tap Connect');

	// Show the saved device name, if any.
	var name = localStorage.getItem('deviceName');
	if (name) {

		app.deviceName = name;
	}
	$('#deviceName').val(app.deviceName);

	// Register callback for connectButton
	$('#connectButton').click(app.onConnectButton);	
};

If there is a device name already in local store from previous sessions, go ahead and pick it up.

   const ACCELERATION_SAMPLE_PERIOD = 200; 
   const MOTION_SERVICE_UUID = '2000';
   const ACCELERATION_CHARACTERISTIC_UUID = '2001';

The UUID for acceleration and motion services are defined as constants in the top of the file, along with the interval between samples (in milliseconds).

app.timer = setInterval(function() {
   app.gattServer.getPrimaryService(MOTION_SERVICE_UUID)
   .then(service => {
        app.motionService = service;
        return app.motionService
       .getCharacteristic(ACCELERATION_CHARACTERISTIC_UUID);
       })
   .then(characteristic => {
       app.accelerationCharacteristic = characteristic;
       return app.accelerationCharacteristic.readValue(); 
      })
 .then(accelerationBuffer => {     // Parse acceleration variables. 
     var ax = accelerationBuffer.getInt16(0, true) / 100.0;
     var ay = accelerationBuffer.getInt16(2, true) / 100.0;
     var az = accelerationBuffer.getInt16(4, true) / 100.0;
     app.drawDiagram({ x: ax, y: ay, z: az });
     })
.catch(error => {
    app.showInfo(error);
    });   }, ACCELERATION_SAMPLE_PERIOD);

This snippet from app.js is the workhorse of this hybrid app; calling the primary services, its characteristics and ultimately the acceleration data to be displayed in the mobile app, with a timer set to the sample interval in ACCELERATION_SAMPLE_PERIOD.

Go fourth and make apps

So now you can also get going with developing apps for the NXP Hexiwear (http://www.hexiwear.com/) using HTML5 and javaScript. Just download Evothings Studio and start making great apps today!

Viewing all 97 articles
Browse latest View live